


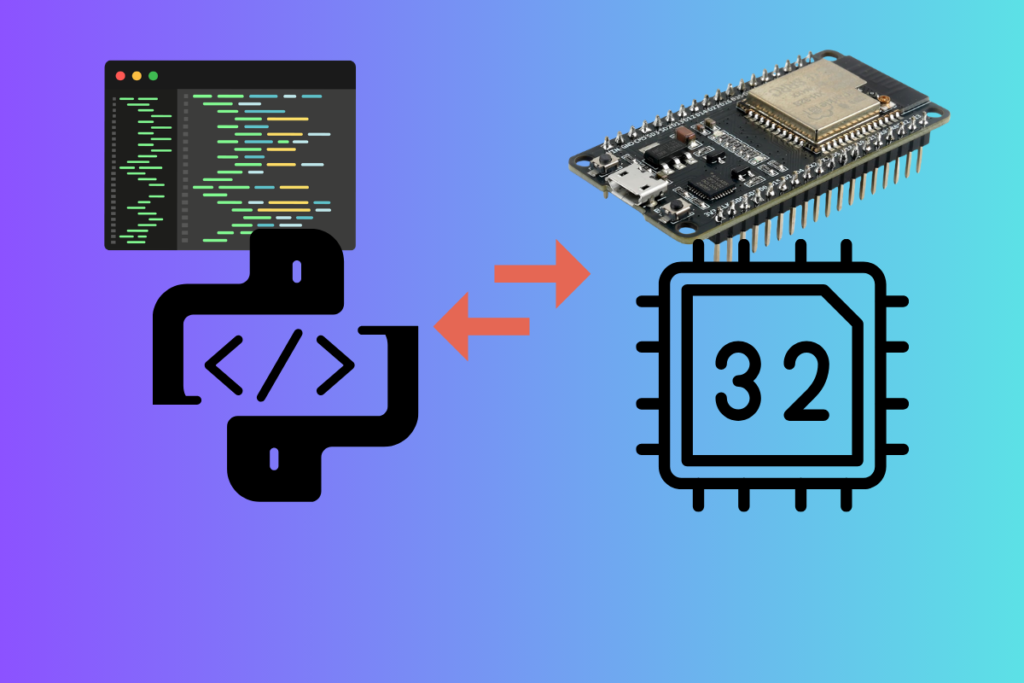
Microcontrollers are widely used in robotics, IoT, and smart electronic systems. In this guide, you will learn how to program a microcontroller using Python with the ESP32 development board and MicroPython. By the end of this article, you will understand embedded systems and write your first working program on ESP32.
Before moving how to program the Microcontroller and Make some Projects lets understand some terms related to the Microcontroller.
We can say that a microcontroller is the brain of an electronic machine, because it controls all the operations, takes input from sensors, processes the information, and gives output to devices like motors, LEDs, or displays—just like the human brain controls the body. When a microcontroller is programmed and embedded inside a device to perform a specific task, the complete setup is called an embedded system.
What is an Embedded System?
Embedded systems in electronics and robotics are small computers built inside a machine to perform a specific task.
Unlike a laptop or mobile phone, an embedded system:
- Does one job
- Works continuously
- Is designed for efficiency and control
Examples of Embedded Systems
- Washing machine controller
- Traffic signal system
- Smart door lock
- Robot controller
- Microwave oven
- Automatic Door Controller
In robotics, the brain of the robot is an embedded system.
Why Embedded Systems are Important in Robotics
Robots need to:
- Read sensor data
- Make decisions
- Control motors and actuators
- Work without human help
- And have a little bit of memory
All of this is done using an embedded system.
Without embedded systems:
- Robots cannot move
- Sensors are useless
- Automation is impossible
Microcontroller – The Brain of the Robot
A microcontroller is a small embedded computer on a single chip.
It contains:
- Processor (CPU)
- Memory (RAM + Flash)
- Input/Output pins (GPIO)
- All in one single Chip
Microcontroller Used in This Article
ESP32 is a popular microcontroller used in IoT and robotics projects
Why ESP32?
- Supports Python (MicroPython)
- Fast and powerful
- Built-in WiFi & Bluetooth
- Widely used in industry
- Ideal for students
- Easy to learn
Python for Embedded Systems
Until recently, embedded systems were programmed using C/C++.
Now, we can use Python, which is:
- Easy to learn
- Readable
- Powerful
Embedded Python Options are
- MicroPython (used in this Article)
- CircuitPython
MicroPython is a special version of Python made for microcontrollers.
lets understand how MicroPython (Embedded Python)is different from Python which runs on the Pc.
Difference between PC Python and Embedded Python
| Feature | PC Python | Embedded Python |
|---|---|---|
| Where it runs | Runs on a computer/laptop (Windows, Linux, macOS) | Runs on microcontrollers (ESP32, Raspberry Pi Pico, MicroPython boards) |
| Purpose | General programming: apps, AI, data science, games | Control hardware like LEDs, motors, sensors |
| Resources available | High memory, storage, powerful CPU | Very limited memory and processing power |
| Libraries | Huge libraries (NumPy, Pandas, TensorFlow) | Limited libraries (machine, time, GPIO-related) |
| Hardware access | Indirect (needs external devices) | Direct control of pins, sensors, actuators |
| Speed & performance | Faster due to powerful system | Slower due to limited hardware |
| Examples | Desktop apps, websites, automation scripts | IoT devices, robots, smart systems |
| Python version | CPython | MicroPython / CircuitPython |
Tools which will be required to begin learning the microPython are:-
Tools Required to Program ESP32 Using MicroPython
Hardware
- ESP32 Development Board
- USB Data Cable
- Laptop / PC
Software
- Thonny IDE
- MicroPython Firmware
If you haven’t installed the Thonny IDE, here is the quick setup guide of Thonny IDE is here:-
Installing MicroPython on ESP32 (One-Time Setup)
Step 1: Connect the ESP32 to the computer via the USB Port
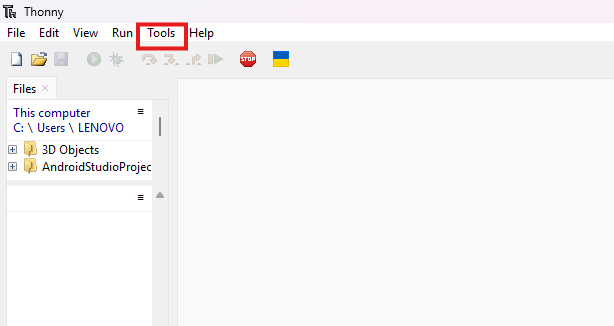
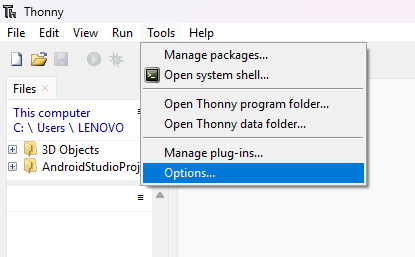
Step 2: Open Thonny IDE
- Go to Tools → Options → Interpreter

Step 3: Select Interpreter
- Interpreter: MicroPython (ESP32)
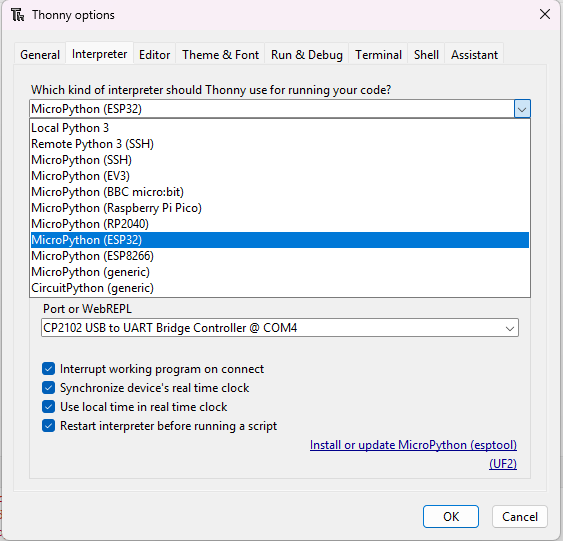
- Select the correct COM Port
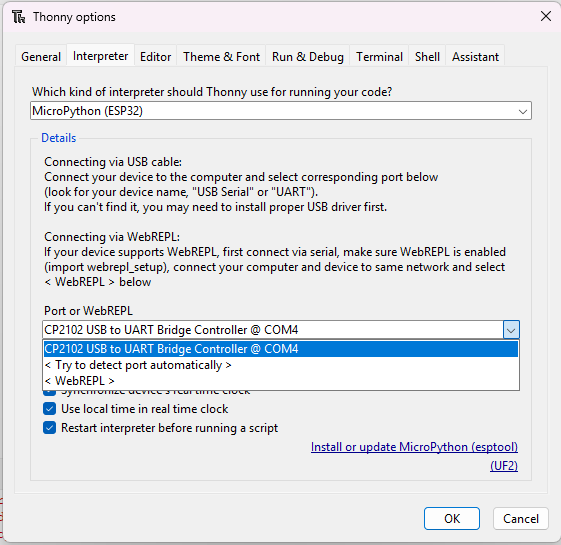
NOTE:- If you are not able to find the COM Port, you have to install the CP210X driver in your computer
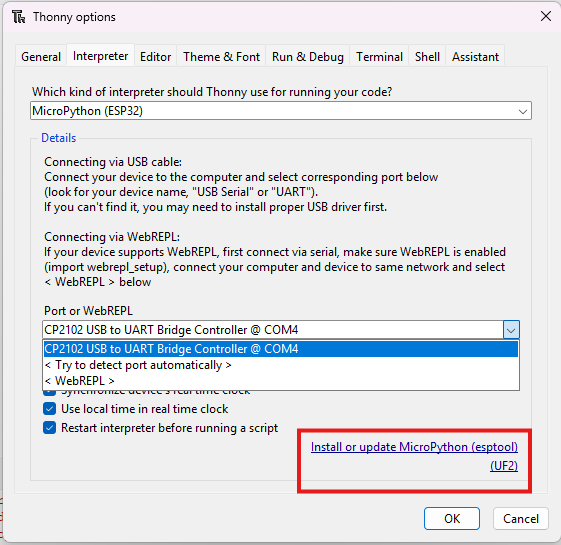
Step 4: Install Firmware
- Click Install or Update MicroPython
- Select the details as per the picture: Target port- COM port, Micropython family – ESP32, Variant- Espressif ESP32/WROOM
- If you have another board you can choose accordingly
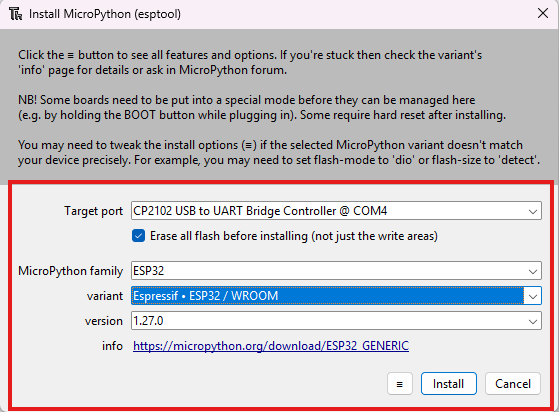
- Click Install
ESP32 is now Python-ready.
Writing the First Program for ESP32
Activity:- Blinking the Onboard LED
This is a basic MicroPython LED blinking program for ESP32.
Objective
To upload the first Python program and control the onboard LED of the ESP32.
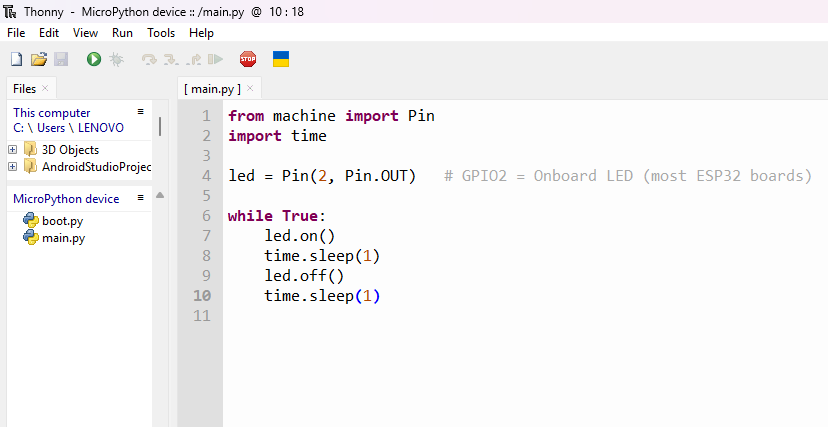
from machine import Pin
import time

led = Pin(2, Pin.OUT)

while True:
    led.on()
    time.sleep(1)
    led.off()
    time.sleep(1)
Steps to Upload the Code
- Connect ESP32 using USB cable
- Open Thonny IDE
- Paste the code
- Click Run (▶️)
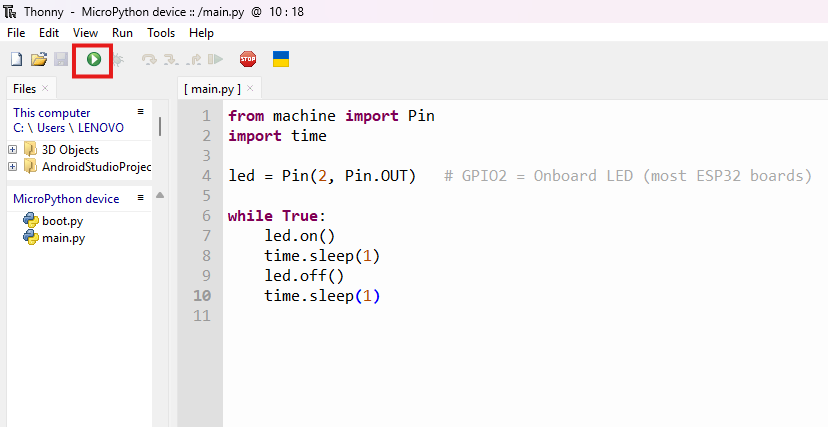
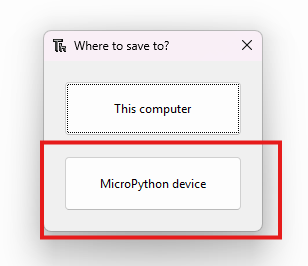
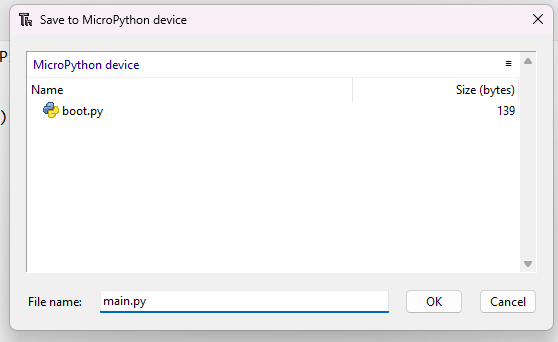
- Save the file as main.py
Try saving the file with a different name and find out what happens!
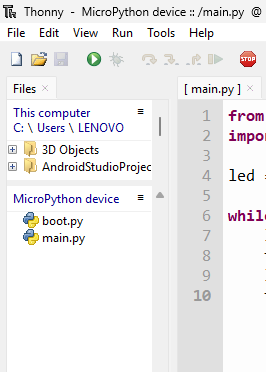
Here we can see the files saved in your esp32 device, as under MicroPython device: boot.py and main.py
Output
- The onboard LED blinks every 1 second
- The program runs automatically on power ON
Understanding the Code
Importing Libraries
- machine → A built-in MicroPython module used to control hardware (pins, sensors, motors, etc.).
- Pin → A tool inside the machine module used to control the GPIO pins.
- time → Used for delays (waiting).
| Code Part | Explanation |
|---|---|
Pin(2) | Selects the GPIO pin connected to the LED |
Pin.OUT | Sets pin as output |
while True | Runs program forever |
sleep(1) | Delay of 1 second |
File System in ESP32
ESP32 stores Python programs like a small storage device.
Important Files
main.py→ Runs automatically on startupboot.py→ Runs before main.py
Key Rule
Save important programs as main.py
Safety Rules
- Handle batteries carefully
- Do not supply more than 5V to ESP32
- Disconnect motors while uploading code
- Always connect GND to GND
Practice Activities
- Change LED blinking speed
- Turn the LED ON for 2 seconds and OFF for 0.5 seconds
- Save the program as
blink.pyand observe behavior - Delete the file and re-upload it as
main.py
Conclusion
We have learned how to write our first MicroPython Code and successfully tested by blinking one LED on the ESP32. This gives us an idea how we can control a Hardware or a machine by writing and uploading code in machine. In the Next article we will be learning how to connect any external components(LEDs, Motors, Sensors, etc.) in the ESP32 and control it.
Common ESP32 Errors
- ESP32 not detected / COM port not showing (CP210x driver missing) — Install the CP210x USB-to-UART driver from Silicon Labs and reconnect the ESP32 board.
- Failed to connect to ESP32 (Timed out) — Hold BOOT while uploading, select correct COM port, use a data USB cable.
- Code uploaded but nothing happens — Check GPIO pin, wiring, and save file as
main.py(MicroPython). - ModuleNotFoundError (library missing) — Upload the required
.pylibrary file to the ESP32. - ESP32 keeps restarting (boot loop) — Check power supply and wiring; remove faulty modules.
- PermissionError / COM port busy — Close Serial Monitor or any software using the port.
- Upload works once then fails — Press EN (Reset) or hold BOOT during upload.
- Device busy in Thonny — Stop the running script or press the Reset button.
- GPIO not responding — Avoid boot/flash pins (GPIO0, 1, 3, 6–11) and use safe pins like 2, 4, 5, 18–23.
